When I took my first Bikram yoga class, eight years ago, I was a foot away from touching my toes. I couldn’t get any part of my stomach on my legs in the first stretching pose. My hips were so tight that I couldn’t kick out in Standing Bow, I just barely clasped on to my foot and breathed through the intense stretching on the front of my hip.
So when I hear people say, “I can’t do yoga, I’m not flexible”, I get it. The problem is, those of us stiff as a board have it all wrong. Yoga makes you flexible!
It’s hard to look around the room and realize that your fellow flexible yogis likely didn’t look that way when they first started yoga practice. A consistent practice and focusing on a few postures will make your body loosen up in ways you never imagined. Don’t take it from me, you’ll have to see for yourself.
 Work really, really hard in the first stretching pose.
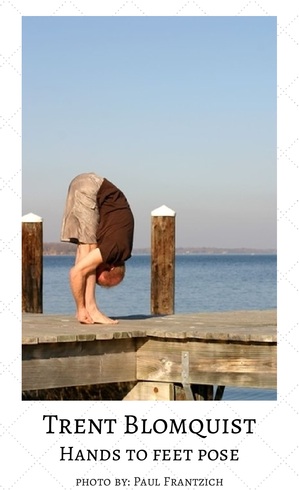
In the final part of Half Moon pose, you do padahastasana, or Hands to Feet pose. You know, the posture where your’e upside down, panting, feeling claustrophobic, trying to grip your feet and your hamstrings scream? Yes – that one!
If you work hard in this posture it will help set the tone for your flexibility throughout class. I struggle a lot with this posture, and find putting my face to my legs, a hot suffocating experience. It’s often true that the postures we hate are the ones we need the most. If you’re like me and you struggle with getting through this posture, try breathing and saying “I love this posture” over and over. It sounds corny, but it works. By really stretching in this first posture, the subsequent standing postures will be much easier.
Work hard in Hands to Feet pose and reap the reward. (Check out how beautifully Trent’s body is pressed to his thighs –>)
Stretch a little before & after class.
Getting five minutes of stretching in before and after class will rapidly increase your flexibility. Before class starts I like to do passive, gentle stretches like straddling my mat and leaning forward with my arms crossed. I also do the “warm up” before Hands to Feet pose, where you do the cha-cha-cha. As I gently cha-cha, I try to get my head closer to my knee, opening up my back. After class I can do five minutes of deeper stretching of my hamstrings and back.
Standing Head to Knee gets easier as you gain flexibility.
When I took a break from class (around 3 weeks) I came back to a different, inflexible body that reminded me of when I first started practicing yoga. Standing Head to Knee will get much easier the more you open up your hamstrings.
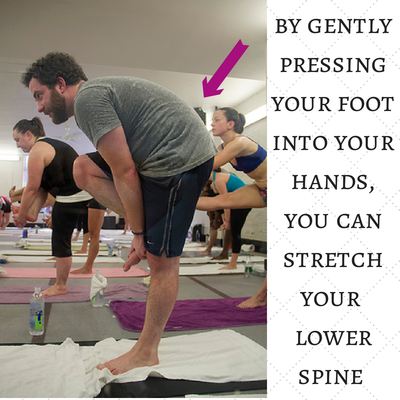
The good news is this posture is great for opening up a tight spine and lower back. When you suck in your stomach and grab your foot, you can lightly press into your hands to stretch your lower spine.
 If you have a very tight spine it’s easy to over stretch your spine when you do this, so take it easy and engage your core. The flexibility of your spine and hamstrings are intimately linked. Helping stretch one, will help the other.
Put your head to knees after sit ups.
The teacher should deliver this as part of the dialogue, but it’s an easy step to skip. When you do your sit ups, make sure you fully hook your two fingers in between your big toe and the second toe. Bend your knees to place your head on your knees and pull. You should feel the stretching down your spine as you do this, and of course, all along your hamstrings. Sit ups are a great way to increase your spine and hamstring flexibility, but you need to execute each one as if it’s your last. Take your time to make sure you’re getting the stretch before turning around and getting into the next posture.
Standing Bow stretches hamstrings beautifully.
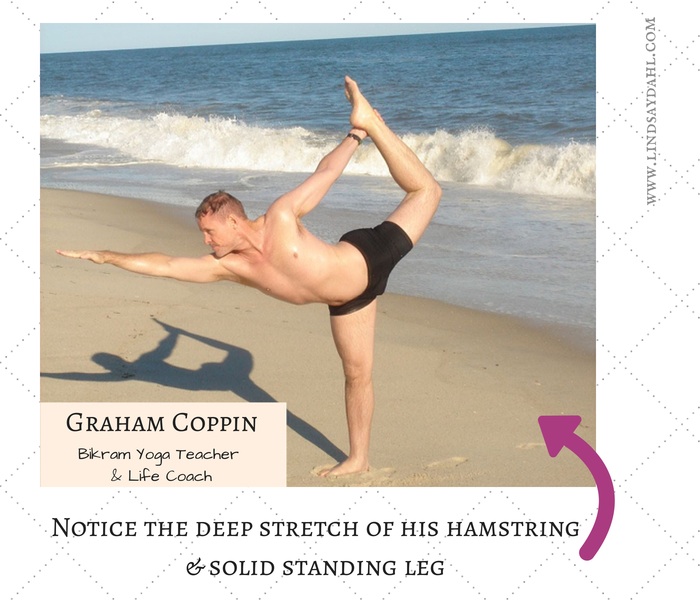
So much of Standing Bow’s “success” resides in the standing leg. Sure you’ll get a great stretch on the front of your hip flexors but in addition you can use Standing Bow as a way to get a long, deep stretch of your hamstrings.
This means approach the posture thinking you will hold it for the entire dialogue. If you focus on a solid, constricted standing leg you will slowly open up your hamstring throughout the posture. Staying in Standing Bow is often mental, use this as a reason to hold the posture the whole 60 seconds. Notice that as the posture concludes (the last 15 seconds or so) you should feel your hamstrings release. Make sure you’re adequately locking your knee and quadricep muscle to avoid pulling your hamstring. And breathe!
Consistency is key.
Practice at least four times a week, even more if you have the time to drastically improve your flexibility. Even though when I don’t practice I temporarily lose my flexibility, within a few classes it comes back. I am able to do things I never thought possible because I had passed myself off as permanently inflexible. If there is one thing that Bikram yoga has taught me (which there isn’t because I continue to learn so much!) it’s that what you once thought impossible, is in fact possible.
Don’t get psyched out by the Gumby’s in class, we’re all coming from different places and all you need to do is focus on your practice. The rewards will be amazing.
Can you “over stretch” with the heat in Bikram Yoga?
One of the common misconceptions about Bikram yoga is that with the heat people are prone to overstretch and hurt themselves. The opposite is true. For inflexible people stretching in a cold room is a recipe for injury. The heat allows us to open up our muscles and create wonderful natural flexibility. Like any yoga practice, you can over do things and hurt yourself, but the heat doesn’t lead to increased injuries. You must listen to your body and learn the difference between an intense stretch (good) and sharp shooting pain (bad).
Your flexibility will ebb and flow by day, week and month, just like your practice. Know that gaining significant flexibility is within reach. The hatha yoga postures that make up this series have endless health benefits, and for me being able to touch my toes is nothing short of a miracle.
Interested in finding out more about Graham’s work as a life coach? Visit his website here: Graham Coppin – Life Coach: Your life. Now.
Never miss a post and join my mailing list.
(Photo credit: weeklydig – Flickr CC)


